Quick guide
Installation and start
-
First install EOS Utility from CD, then update it with the latest version from CANON.
- Connect hte camera over USB and switch it on.
- Set EOS Utility to “Remote Live View “.
- To install execute the downloaded “EosAutoShooter.msi”
file, then start by clicking the new desktop icon.
- The type of your camera (“EOS 500D”, “EOS 70D”, etc) must
be entered in menu item “Settings/camera type”.
- EosAutoShooter connects automatically with EOS Utility.
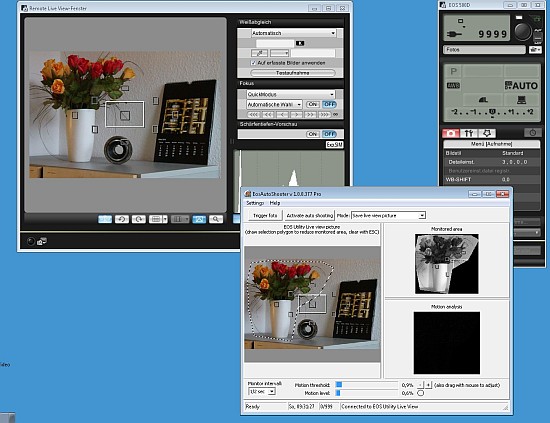
- After start the windows of EosAutoShooter and Eos Utility
must be arranged in a non-overlapping way.
Automatic exposure of photos
- Start EOS Utility in Remote Live View mode;
- Connect camera over USB and arrange for a motive.
- Start EosAutoShooter
-
Set mode to “Shoot with camera” or “Save live view picture”.
- Setup “Motion threshold”
-
Mark the important image section with a mouse-drawn polygon.
-
Trigger on picture manually by clicking the “Trigger photo” button.
-
Some CANON tools start and their windows up. Minimize them, but do not close
them.
-
Press down the “Activate AutoShooting” button. Now EosAutoShooter is armed and
shoots photos on motion.
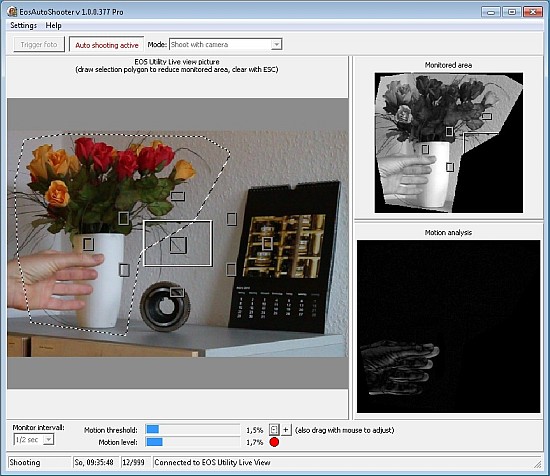
In the example above I’ve set up the camera to a static motive (the flowers) and marked the
motion detection area with a polygon (dashed lines).Then I moved my hand in front; this
motion is detected.
Automatic recording of movies
-
Set EOS Utility and camera in Remote Video mode. This needs a few steps:
- Camera mode dial to “[P]”,
- Start EOS Utility in Live View mode,
- Camera mode dial to “[Movie]”,
- in Remote Live View window press the “Prepare camera for movie” button (if
applicable).
-
Use EosAutoShooter as described above, but set mode to “Record movie” stellen.
|

